Integration
The Integration menu is used to configure and manage integrations between Data Touch and external applications or services.
The page contains the following tabs:
- Integrations
- Events
- Templates
These tabs work together to define how Data Touch connects to external systems, which events trigger an integration, and what content is sent when an event occurs.
Integrations
The Integrations tab is used to add and manage external integrations.
The tab contains the following sections:
- Add Integration
- My Integrations
Add Integration
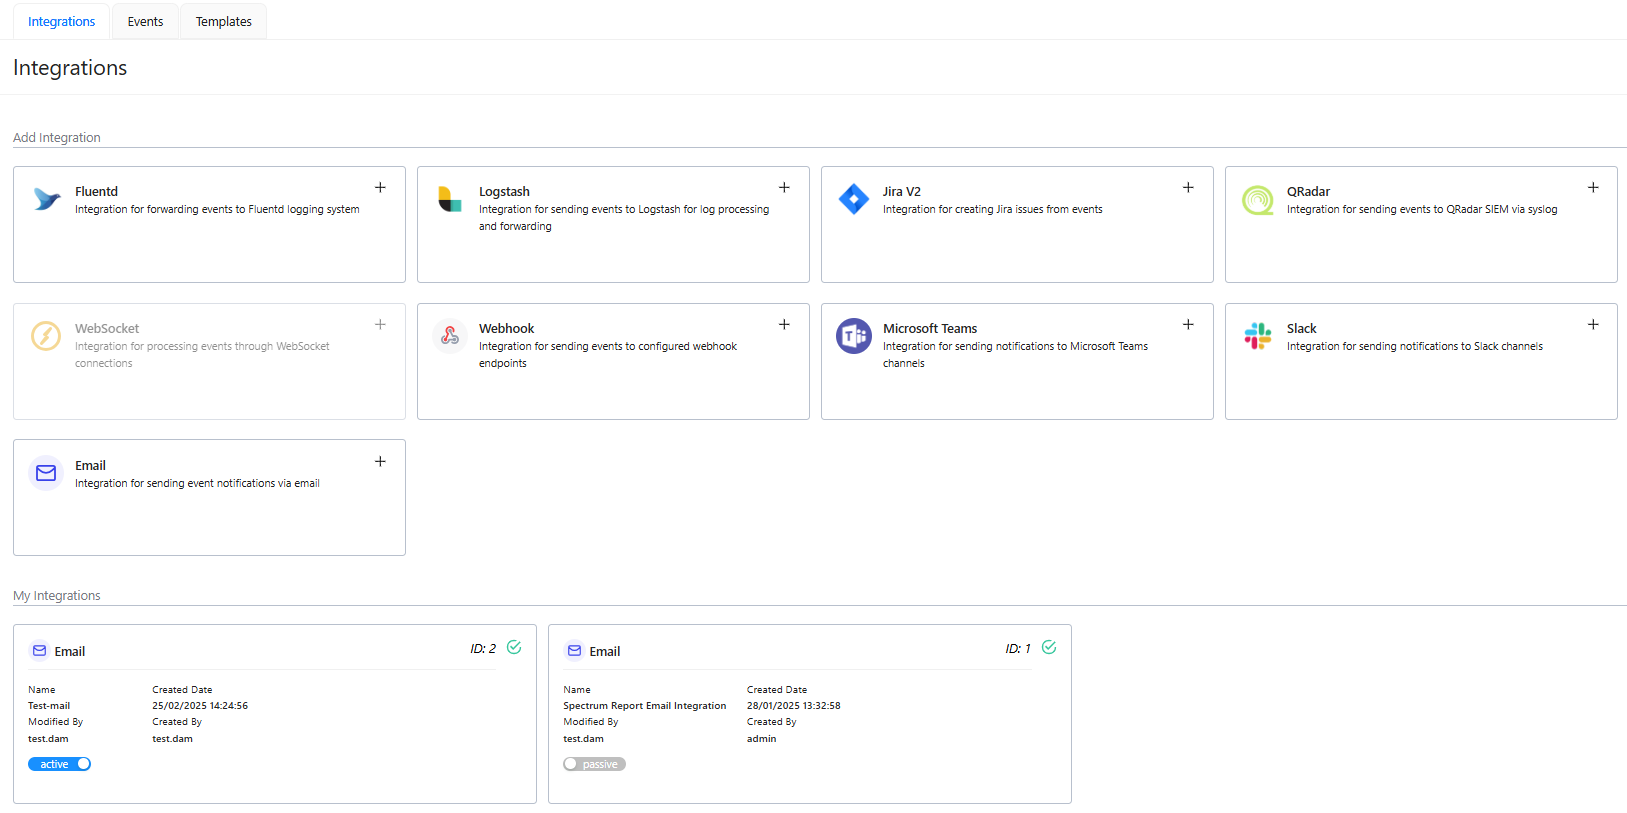
The Add Integration section displays the integration types available for configuration.
To add an integration:
- Locate the required integration.
- Select the + button for the integration.
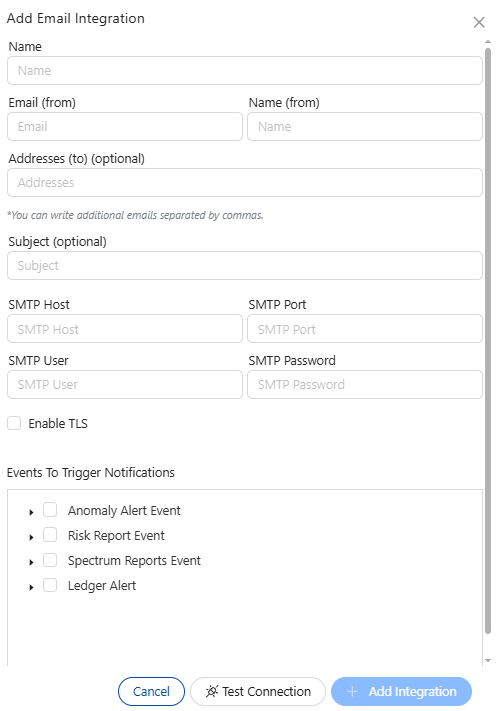
- Complete the required configuration fields.
- Select Test Connection to verify the connection settings.
- Select + Add Integration.
Note
Use Test Connection before adding the integration to verify that Data Touch can connect to the configured external system.
My Integrations
The My Integrations section lists integrations that have already been added to Data Touch.
Use the Active/Passive toggle to enable or disable an integration.
- Active — The integration is enabled and available for use.
- Passive — The integration remains configured but is disabled.
Events
The Events tab is used to define and manage events that can trigger integration actions.
An event represents an activity or condition in Data Touch that can be associated with an integration workflow.
For example, a Spectrum Reports event can be configured so that report-related information is sent through an E-Mail integration when the event is triggered.
Event list
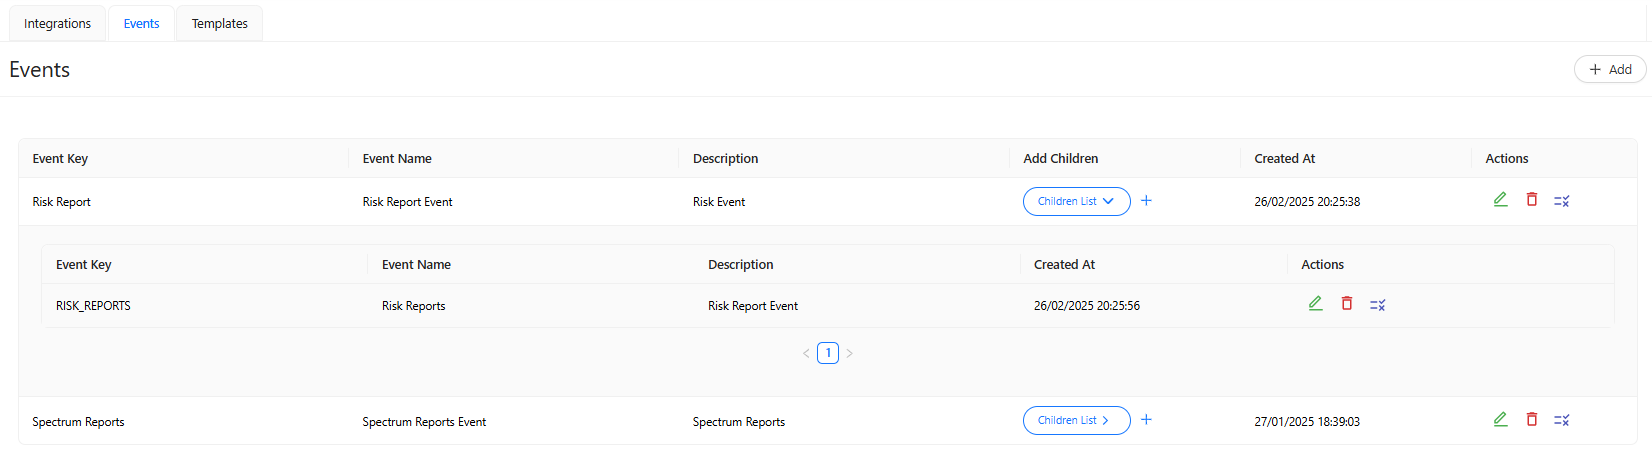
The Events tab displays configured events and provides actions for managing them.
Events can also contain child events.
View child events
Select Children List to display the child events associated with an event.
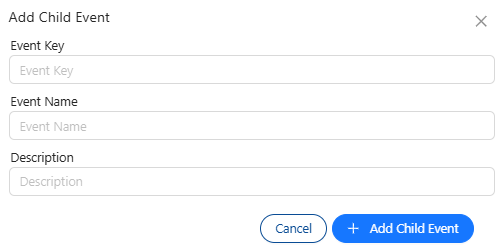
Add a child event
Select the + button next to Children List to create a child event for the selected event.
Child events allow an event structure to be divided into more specific event types when required.
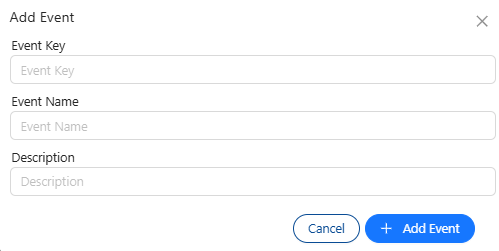
Add an event
Select + Add in the upper-right corner of the Events tab to create a new event.
In the window that opens, complete the following fields:
| Field | Description |
|---|---|
| Event Key | Specifies the unique key used to identify the event. |
| Event Name | Specifies the display name of the event. |
| Description | Provides additional information about the purpose of the event. |
To create the event:
- Enter an Event Key.
- Enter an Event Name.
- Enter a Description.
- Select + Add Event.
Event data
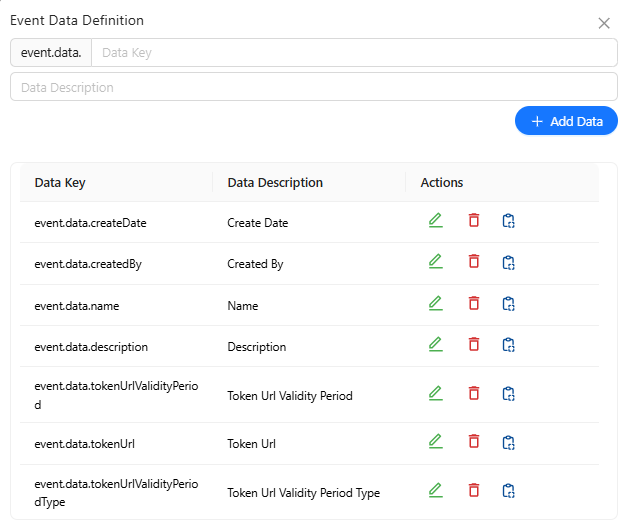
Select the Add Event Data  action to define data associated with an event.
Event data can be configured separately for:
- Parent events
- Child events
Event data defines the information that can be used when processing the event or generating integration content.
Manage event data
Existing event data can be managed from the Actions column.
Available actions include:
- Edit — Modifies the selected event data.
- Delete — Removes the selected event data.
- Copy Key — Copies the event data key.
Select Copy Key  to copy the key associated with the selected event data.
Templates
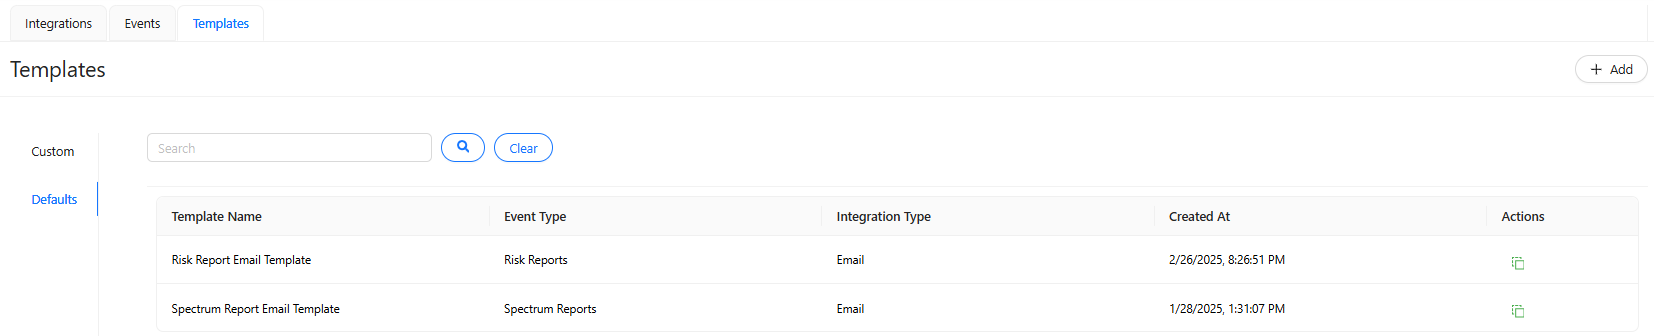
The Templates tab is used to define the content delivered through an integration when an event is triggered.
A template is associated with an integration type and an event type. When the corresponding event occurs, Data Touch uses the configured template to generate the content sent through the selected integration.
For example, when a Spectrum Reports event is triggered, Data Touch can use an e-mail template to generate a message that contains event information and, when applicable, report-related content or attachments.
Create a template
You can create a template in either of the following ways:
- Clone an existing template.
- Create a new template from scratch.
Clone a template
Use Clone when you want to create a new template based on an existing configuration.
To clone a template:
- Select Clone
 in the Actions column.
- Review the existing template configuration in the window that opens.
- Modify the values as required.
- Select + Add Template.
The original template remains unchanged.
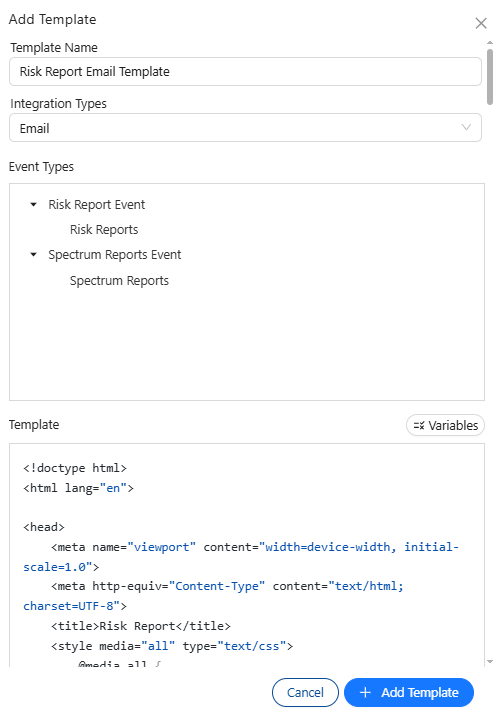
Create a template from scratch
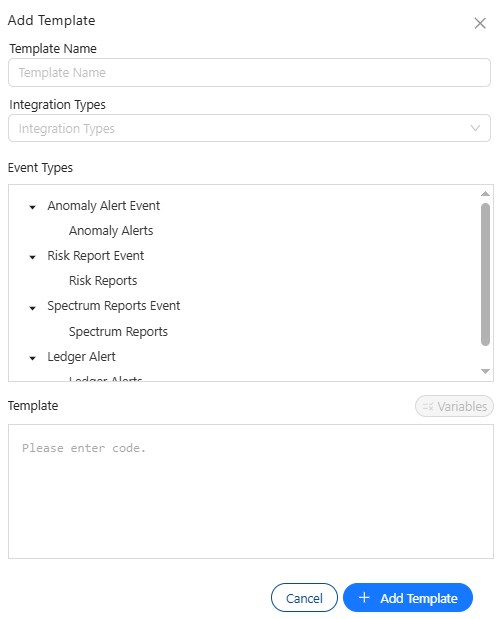
Select + Add in the upper-right corner of the Templates tab to create a new template.
Complete the following fields:
| Field | Description |
|---|---|
| Template Name | Specifies the name of the template. |
| Integration Type | Specifies the integration used to deliver the generated content. |
| Event Type | Specifies the event that triggers the template. |
| Templates | Defines the content or message body generated when the event is triggered. |
To create the template:
- Enter a Template Name.
- Select an Integration Type.
- Select an Event Type.
- Define the content in Templates.
- Select + Add Template.